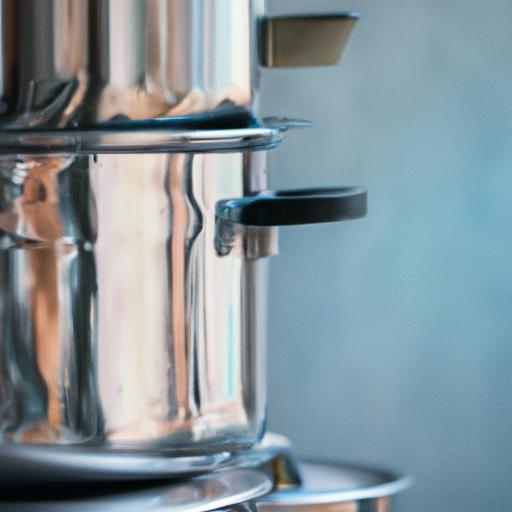
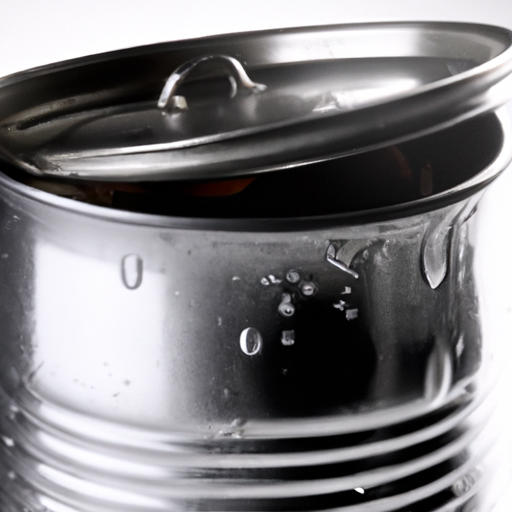
Maintaining and cleaning your pressure canner is essential to ensure its longevity and safety. In this article, you will discover simple yet effective tips to keep your pressure canner in optimal condition. By following these guidelines, you can enjoy the benefits of using your pressure canner for years to come, while also ensuring that your canned goods are safe and free from any potential contaminants.
Inspecting the Pressure Canner
Check the Gasket for Wear and Tear
The gasket is a crucial component of the pressure canner as it forms a seal between the lid and the pot, ensuring that pressure builds up within the canner. Regularly inspect the gasket for signs of wear and tear, such as cracks or brittleness. If you notice any damage, it is important to replace the gasket to ensure the safety and effectiveness of the canner.
Inspect the Lid for Damage
The lid of the pressure canner is another area that should be regularly inspected for any damage. Look for signs of dents, scratches, or warping that could affect the proper functioning of the canner. If you notice any issues with the lid, it is advisable to contact the manufacturer for a replacement or repair.
Check the Pressure Gauge for Accuracy
The pressure gauge is responsible for indicating the pressure inside the canner during the canning process. It is crucial to ensure that the gauge is accurate to prevent under or overprocessing of the food. To check the accuracy of the pressure gauge, you can use a calibrated gauge or have it tested by a professional. If the gauge is found to be inaccurate, it should be replaced or recalibrated.
Inspect the Safety Devices
Pressure canners are equipped with safety devices such as pressure regulators and safety fuses to prevent accidents during the canning process. Regularly inspect these safety devices to ensure they are in good working condition. If you notice any signs of damage or malfunction, it is important to replace them immediately. Safety should always be a top priority when using a pressure canner.
Cleaning the Pressure Canner
Remove the Gasket and Clean it Separately
To clean the pressure canner effectively, it is advisable to remove the gasket and clean it separately. The gasket can accumulate food particles and debris, which may hinder its performance. Carefully remove the gasket from the lid and soak it in warm soapy water. Use a soft cloth or sponge to clean the gasket, ensuring that all residues are removed. Rinse the gasket thoroughly and allow it to dry completely before reattaching it to the lid.
Clean the Interior of the Pressure Canner
The interior of the pressure canner is exposed to high temperatures and food particles during the canning process, making it essential to clean it regularly. Start by filling the canner with warm water and detergent, ensuring that the water level covers any stubborn stains or residue. Scrub the interior with a soft brush, paying extra attention to the bottom and sides. For stubborn stains, vinegar can be used as a natural cleaning agent. Rinse the canner thoroughly to remove any soap or vinegar residue.
Clean the Exterior of the Pressure Canner
While the interior of the canner is the primary focus of cleaning, it is also important to clean the exterior to maintain its appearance and longevity. Wipe the exterior with a damp cloth to remove any dirt or stains. For stubborn stains, mild cleaning solutions can be used, but be sure to avoid abrasive cleaners or scouring pads, as they can damage the finish of the canner. After cleaning, dry the exterior thoroughly to prevent any moisture buildup.
Clean the Pressure Gauge and Vent
The pressure gauge and vent are crucial components of the pressure canner that require proper cleaning to ensure accurate readings and efficient operation. Use a soft brush to gently clean the pressure gauge, ensuring that any dirt or debris is removed. The vent can be cleaned using a pipe cleaner to ensure it remains clear of any clogs or blockages. It is important to keep these parts clean to maintain the canner’s functionality and accuracy.
Remove Mineral Deposits
Over time, mineral deposits can build up on the interior surfaces of the pressure canner, affecting its performance and appearance. To remove these deposits, fill the canner with a solution of equal parts vinegar and water. Allow the solution to sit for at least 30 minutes to break down the mineral deposits. Scrub the interior surfaces with a soft brush, paying particular attention to areas with stubborn stains. Rinse the canner thoroughly to remove any vinegar residue before using it again.

Disassembling the Pressure Canner
Remove the Lid
To disassemble the pressure canner, start by removing the lid. This is usually done by unscrewing or releasing the locking mechanism. Carefully lift the lid away from the canner and set it aside for further cleaning.
Detach the Pressure Regulator
After removing the lid, locate the pressure regulator attached to the lid. Depending on the model, it may be screwed on or held in place by a locking mechanism. Remove the pressure regulator and set it aside for cleaning.
Take Out the Rack and Vent Pipe
Inside the canner, you will find a rack used to separate the jars and a vent pipe that allows excess steam to escape. Carefully remove these components from the canner, ensuring not to damage or misplace them. They can be cleaned along with the other parts of the canner.
Remove the Gasket and Safety Fuse
If your pressure canner has a removable gasket or safety fuse, now is the time to remove them. These components may be located on the lid or in other parts of the canner. Follow the manufacturer’s instructions to safely remove these pieces and clean them separately.
Cleaning the Gasket and Lid
Soak the Gasket in Warm Soapy Water
Once you have removed the gasket from the pressure canner, it is important to give it a thorough cleaning. Start by soaking the gasket in warm soapy water. This will help to loosen any debris or residue that may have built up on the surface.
Use a Soft Cloth or Sponge to Clean the Gasket
After soaking, gently scrub the gasket with a soft cloth or sponge. Pay special attention to any crevices or grooves where food particles may have become lodged. Ensure that all traces of dirt and residue are removed.
Clean the Lid with Mild Detergent and Water
While the gasket is soaking, you can clean the lid of the pressure canner. Use a mild detergent and water solution to wipe down the lid, paying attention to any areas that may have accumulated debris or stains. Rinse the lid thoroughly to remove any soap residue.
Dry the Gasket and Lid Thoroughly
Before reassembling the pressure canner, it is important to ensure that both the gasket and lid are completely dry. Use a clean towel or allow them to air dry naturally. Moisture can contribute to the growth of mold or bacteria, so ensuring thorough drying is essential.

Cleaning the Pressure Canner Interior
Fill the Canner with Warm Water and Detergent
To clean the interior of the pressure canner, fill it with warm water and add a small amount of detergent. The detergent will help to break down any grease or food residue that may be present.
Scrub the Interior with a Soft Brush
Using a soft brush, gently scrub the interior of the canner. Focus on any areas that may have stubborn stains or residue. Pay particular attention to the bottom and sides of the canner.
Remove Stubborn Stains with Vinegar
For stubborn stains or mineral deposits, vinegar can be an effective cleaning agent. Apply a small amount of vinegar to the brush and scrub the affected areas. Vinegar’s acidic properties help to dissolve and remove the stains.
Rinse the Canner Thoroughly
After cleaning, it is important to rinse the canner thoroughly to remove any soap or vinegar residue. Rinse until the water runs clear and there are no traces of cleaning solutions remaining.
Cleaning the Pressure Canner Exterior
Wipe the Exterior with a Damp Cloth
To clean the exterior of the pressure canner, start by wiping it down with a damp cloth. This will help to remove any surface dirt or stains.
Use Mild Cleaning Solutions for Stubborn Stains
For stubborn stains or buildup on the exterior, mild cleaning solutions can be used. However, it is important to avoid abrasive cleaners or scouring pads as they can damage the surface finish of the canner. Instead, opt for gentle cleaners that are safe to use on the material of your canner.
Avoid Abrasive Cleaners and Scouring Pads
As mentioned earlier, it is crucial to avoid abrasive cleaners and scouring pads when cleaning the pressure canner exterior. These can scratch or damage the finish, compromising the appearance and potentially creating areas where dirt can accumulate.

Cleaning the Pressure Gauge and Vent
Use a Soft Brush to Clean the Pressure Gauge
To clean the pressure gauge, use a soft brush to gently remove any dirt or debris. Be careful not to apply excessive force that could damage the delicate mechanisms inside.
Clean the Vent using a Pipe Cleaner
The vent is responsible for releasing excess steam during the canning process. To clean it, use a pipe cleaner or a small brush to remove any residue or clogs that might be present. Ensure that the vent is completely clear and unobstructed.
Ensure the Vent is Clear of Debris
After cleaning, it is important to ensure that the vent is clear of any debris or obstructions. A blocked or clogged vent can affect the canner’s performance and safety. Double-check that the vent is completely clear before using the canner.
Removing Mineral Deposits
Fill the Canner with Vinegar and Water Solution
To remove mineral deposits from the pressure canner, prepare a solution of equal parts vinegar and water. Fill the canner with this solution, ensuring that it covers the areas with deposits.
Allow the Solution to Sit for at Least 30 Minutes
After filling the canner, allow the vinegar and water solution to sit for at least 30 minutes. This will give the vinegar time to break down the mineral deposits.
Scrub the Interior with a Soft Brush
Using a soft brush, scrub the interior of the canner to remove the loosened mineral deposits. Pay extra attention to areas where deposits are particularly stubborn.
Rinse the Canner Thoroughly
After scrubbing, rinse the canner thoroughly to remove any vinegar or mineral residue. It is important to remove all traces of the cleaning solution to ensure the canner is safe for use.

Reassembling the Pressure Canner
Place the Gasket Back in its Position
When reassembling the pressure canner, start by placing the cleaned gasket back in its position on the lid. Ensure that it is securely seated and properly aligned.
Reattach the Safety Fuse and Vent Pipe
If your pressure canner has a removable safety fuse or vent pipe, reattach them to the appropriate positions. Follow the manufacturer’s instructions to ensure they are properly secured.
Insert the Rack and Vent Pipe
Inside the canner, reinsert the rack and vent pipe back into their respective positions. Ensure that they are correctly placed and won’t interfere with the canning process.
Securely Place the Lid on the Canner
Finally, securely place the lid back on the canner. Follow the manufacturer’s instructions to properly lock or fasten the lid. It should fit snugly and create a tight seal to maintain the desired pressure during canning.
Regular Maintenance
Inspect the Gasket Regularly
To ensure the continued effectiveness and safety of your pressure canner, make it a habit to regularly inspect the gasket. Check for signs of wear and tear, such as cracks or brittleness. If any damage is detected, replace the gasket promptly.
Replace the Gasket if Damaged
If you notice any damage or degradation of the gasket, it is important to replace it immediately. A faulty gasket can compromise the seal and pressure buildup within the canner, potentially leading to unsafe canning conditions.
Check the Pressure Gauge for Accuracy
Periodically check the accuracy of the pressure gauge to ensure it is providing correct readings. You can use a calibrated gauge or have it tested by a professional to ensure its accuracy. If any discrepancies are detected, consider replacing or recalibrating the gauge.
Perform a Pressure Test Regularly
To ensure the safe operation of your pressure canner, it is advisable to perform a pressure test regularly. This involves bringing the canner up to pressure without any food inside and monitoring its performance. If any issues arise during the test, contact the manufacturer for guidance.
Store the Canner in a Cool and Dry Place
When not in use, store your pressure canner in a cool and dry place. Avoid exposing it to excessive heat, extreme cold, or high humidity, as these conditions can shorten its lifespan. Proper storage will help preserve the canner’s functionality and ensure it remains in good condition for future use.
By following these maintenance and cleaning guidelines, you can ensure that your pressure canner remains in optimal condition, providing you with safe and efficient canning experiences for years to come. Remember to always consult the manufacturer’s instructions for specific care and maintenance recommendations for your particular pressure canner model. Happy canning!

