Have you ever wondered about the differences between water bath canning and pressure canning? Look no further! In this article, we will explore the distinctions between these two popular canning methods. Whether you’re a newbie to the canning world or an experienced home canner, understanding the pros and cons of each technique will help you choose the right method for preserving your favorite fruits, vegetables, and homemade goodies. So, grab a pen and paper, because we’re about to dive into the fascinating world of water bath canning versus pressure canning!
Water Bath Canning
Definition of Water Bath Canning
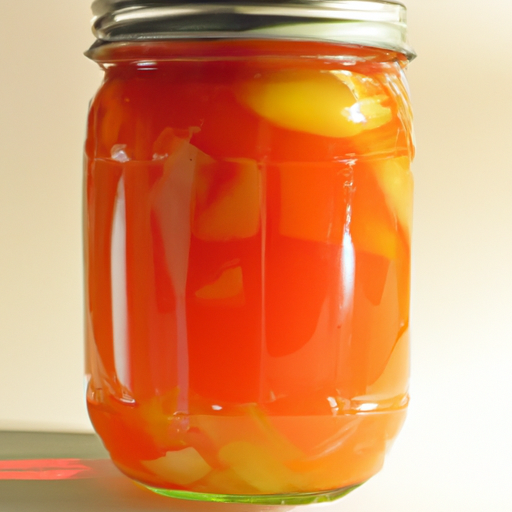
Water bath canning is a technique used to preserve high-acid foods, such as fruits, pickles, and tomatoes, by sealing them in jars and submerging them in a boiling water bath. This method creates a vacuum seal in the jars, preventing the growth of bacteria, yeasts, and molds that can cause food spoilage.
Purpose of Water Bath Canning
The main purpose of water bath canning is to safely store and preserve high-acid foods. By sealing the jars and submerging them in boiling water, any bacteria or microorganisms present in the food are killed, ensuring its safety for consumption. Water bath canning extends the shelf life of these foods, allowing you to enjoy your favorite fruits, pickles, and tomatoes all year round.
Foods Suitable for Water Bath Canning
Water bath canning is typically suitable for preserving high-acid foods with a pH value of less than 4.6. This includes fruits like peaches, pears, and berries, as well as pickles, jellies, jams, and salsa. High-acid foods can be safely stored using water bath canning because the acid content in these foods inhibits the growth of harmful bacteria.
Equipment Needed for Water Bath Canning
To engage in water bath canning, there are several essential equipment and tools you will need. These include:
-
Canning Jars: Use canning jars specifically designed for home canning. They come in various sizes, typically ranging from 4 to 32 ounces.
-
Canning Lids and Bands: These are used to create an airtight seal on the jars. The lids should be new for each canning process, while the bands can be reused as long as they are in good condition.
-
Canning Pot or Stockpot: This large pot will be used to hold the boiling water in which the jars will be submerged. It should be deep enough to fully cover the jars with water and have a tight-fitting lid.
-
Jar Lifter: This tool helps safely lift hot jars in and out of the boiling water bath.
-
Canning Rack or Silicone Trivet: To prevent the jars from touching the bottom of the pot and potentially shattering, you will need a canning rack or a silicone trivet to elevate them.
-
Kitchen Timer: A kitchen timer is essential for accurately timing the canning process.
Procedure for Water Bath Canning
-
Prepare your recipe and gather all the necessary ingredients.
-
Sterilize the canning jars, lids, and bands by placing them in a large pot of boiling water for a few minutes.
-
Prepare the food you intend to can, following a trusted recipe. Ensure that your ingredients and equipment are ready to go.
-
Fill the sterilized jars with the prepared food, leaving the appropriate headspace as specified in your recipe (usually around ¼ inch).
-
Wipe the rims of the jars with a clean, damp cloth to ensure a proper seal.
-
Place the lids and bands on the jars, tightening the bands just until they are snug.
-
Place the filled jars onto the canning rack or silicone trivet inside the canning pot.
-
Fill the pot with enough water to cover the jars by at least 1 inch. Bring the water to a rolling boil.
-
Once the water reaches a rolling boil, set a timer according to your recipe’s specified processing time.
-
After the processing time is complete, use the jar lifter to carefully remove the jars from the boiling water bath and place them on a towel or cooling rack.
-
Allow the jars to cool undisturbed for 12 to 24 hours. During this time, you may hear a satisfying “pop” sound, indicating that the jars have successfully sealed.
-
After the cooling period, check the seals by pressing down on the center of each lid. If it does not flex, the jar is sealed. Remove the bands, wipe the jars clean, label them, and store them in a cool, dark place.
Benefits of Water Bath Canning
Water bath canning offers several benefits for home canners. Firstly, it is a relatively simple and inexpensive method, making it accessible to beginners. The equipment required for water bath canning is readily available and affordable, allowing you to start preserving your own high-acid foods with ease. Additionally, water bath canning helps retain the vibrant colors and flavors of the preserved foods, creating a delightful culinary experience.
Drawbacks of Water Bath Canning
While water bath canning is suitable for preserving high-acid foods, it is not recommended for low-acid foods such as vegetables, meats, and poultry. These low-acid foods require a different method of preservation due to the potential risks associated with bacterial growth, such as botulism. Water bath canning is also not effective at killing certain types of microorganisms, making it essential to use tested recipes to ensure food safety.

Pressure Canning
Definition of Pressure Canning
Pressure canning is a preservation method that uses high temperatures and pressure to safely process low-acid foods, including vegetables, meats, poultry, and seafood. By subjecting the jars to high pressure, all harmful microorganisms, including the bacteria that cause botulism, are eradicated, creating a safe and long-lasting food storage option.
Purpose of Pressure Canning
The primary purpose of pressure canning is to safely preserve low-acid foods that require higher temperatures than water bath canning can provide. The high pressure and temperature achieved during pressure canning destroy dangerous bacteria, ensuring the safety of the preserved food. By using this method, you can enjoy home-canned vegetables, meats, and other low-acid foods without health concerns.
Foods Suitable for Pressure Canning
Pressure canning is suitable for preserving low-acid foods, such as most vegetables, meats, poultry, and seafood. These foods have a pH value higher than 4.6 and are susceptible to the growth of bacteria, including the potentially deadly botulism-causing Clostridium botulinum. Pressure canning effectively eliminates these bacteria, offering a safe preservation method for a wide range of foods.
Equipment Needed for Pressure Canning
To engage in pressure canning, it is important to have the right equipment on hand. The necessary equipment includes:
-
Pressure Canner: This is a specialized canner designed to handle the high pressure required for pressure canning. It typically has a locking lid with a pressure gauge or dial.
-
Canning Jars, Lids, and Bands: Similar to water bath canning, you will need canning jars, lids, and bands suitable for pressure canning.
-
Rack: A rack is essential to elevate the jars and prevent them from coming into direct contact with the bottom of the pressure canner.
-
Jar Lifter: A jar lifter is necessary to safely handle the hot jars during the pressure canning process.
-
Kitchen Timer: Just as in water bath canning, a kitchen timer is a vital tool to ensure accurate processing times.
Procedure for Pressure Canning
-
Start by preparing your low-acid food and gathering all necessary ingredients.
-
Sterilize the canning jars, lids, and bands using hot, soapy water. Rinse them thoroughly.
-
Prepare your pressure canner by following the manufacturer’s instructions. Check that the pressure gauge is working and the rubber gasket is in good condition.
-
Fill the sterilized jars with the prepared food, leaving the appropriate headspace as specified in your recipe.
-
Wipe the rims of the jars clean and place the lids and bands on them, tightening the bands just until they are snug.
-
Place the filled jars on the canning rack inside the pressure canner.
-
Add the specified amount of water to the pressure canner, following the manufacturer’s guidelines. This water will generate the steam needed for pressurization.
-
Lock the lid of the pressure canner securely, making sure the pressure vent is closed.
-
Place the pressure canner on the stovetop and turn the heat to high. Once the canner reaches steam pressure, vent steam for 10 minutes to eliminate air from the canner.
-
Close the pressure vent or add a weighted gauge according to the manufacturer’s instructions to achieve the desired pressure level.
-
Start the processing time once the desired pressure is reached. Ensure that the pressure is maintained for the recommended duration specified in your recipe.
-
After the required processing time, turn off the heat and allow the pressure canner to cool naturally. Do not force-cool or manually release pressure.
-
Once the pressure has naturally returned to zero, carefully unlock and remove the lid.
-
Using a jar lifter, lift the jars out of the canner and place them on a towel or cooling rack. Avoid tilting the jars or shaking them.
-
Allow the jars to cool undisturbed for 12 to 24 hours. As with water bath canning, you may hear a “pop” sound indicating a successful seal.
-
After the cooling period, check the seals, remove the bands, wipe the jars clean, label them, and store them in a cool, dark place.
Benefits of Pressure Canning
Pressure canning offers several advantages when it comes to food preservation. Firstly, it allows you to safely store low-acid foods, including vegetables and meats, without the risk of contamination by harmful microorganisms. The high temperature and pressure achieved during the pressure canning process destroy bacteria, including the spores of Clostridium botulinum, ensuring the safety of your preserved food. Moreover, pressure canning can retain the quality, flavor, and nutritional value of the preserved foods.
Drawbacks of Pressure Canning
Despite its benefits, pressure canning also has a few drawbacks. Firstly, pressure canners are specialized equipment and can be more expensive and harder to find than the equipment required for water bath canning. Additionally, pressure canning requires careful monitoring of pressure levels and accurate timing, making it slightly more complex than water bath canning. However, with practice and following trusted recipes, these challenges can be easily overcome.

Key Differences
Principle of Operation
The principle of operation is one of the key differences between water bath canning and pressure canning. Water bath canning relies on the high temperature of boiling water to kill microorganisms and create a vacuum seal. In contrast, pressure canning uses high pressure and temperature to achieve the necessary heat penetration for low-acid foods.
Temperature and Pressure
The temperature and pressure reached during the two canning methods also differ significantly. Water bath canning typically achieves temperatures of 212°F (100°C) at sea level, while pressure canning goes beyond this to reach temperatures of 240°F (116°C) or higher. The higher temperature of pressure canning is necessary to eliminate bacteria and spores that may be present in low-acid foods.
Types of Foods Preserved
Water bath canning is suitable for preserving high-acid foods, such as fruits, pickles, and tomatoes. On the other hand, pressure canning is specifically designed for low-acid foods like vegetables, meats, poultry, and seafood. The difference in pH levels between these types of foods determines the preservation method required.
Required Equipment
The equipment needed for water bath canning and pressure canning also varies. Water bath canning can be done with a large stockpot, while pressure canning requires a specialized pressure canner. This makes pressure canning a slightly more significant investment, both in terms of equipment cost and availability.
Processing Time
Another significant difference lies in the processing time. Water bath canning usually requires a shorter processing time compared to pressure canning. High-acid foods sealed in jars during water bath canning can typically be processed within 10-30 minutes, whereas low-acid foods during pressure canning may require more extended processing times ranging from 25 minutes to several hours.
Safety Concerns
While both methods are safe when followed correctly, safety concerns differ between water bath canning and pressure canning. Water bath canning is generally considered safe for high-acid foods, as the acidity acts as a natural preservative. However, low-acid foods require the higher temperature and pressure levels achieved in pressure canning to eliminate the risk of bacteria, particularly the spores that cause botulism.
Ease of Use
In terms of ease of use, water bath canning is generally considered simpler and more beginner-friendly than pressure canning. Water bath canning requires basic equipment and fewer precautions, making it accessible to those new to home canning. Pressure canning, although slightly more complex, can be easily mastered with practice and careful instructions.
Versatility
Water bath canning has limitations when it comes to the types of foods that can be preserved. It is primarily suitable for high-acid foods, which limits the versatility of this method. In contrast, pressure canning offers greater flexibility, allowing the preservation of a wide range of low-acid foods, including vegetables, meats, poultry, and seafood.
Storage Flexibility
Water bath canning produces a vacuum seal in the jars, allowing for safe storage at room temperature. This method does not rely on refrigeration or freezing to prevent spoilage. However, pressure canning also provides the option to safely store low-acid foods at room temperature, making it convenient for households with limited refrigerator or freezer space. It offers the flexibility of long-term storage without the energy consumption associated with refrigeration.
Cost Considerations
Cost is another factor to consider when choosing between water bath canning and pressure canning. Water bath canning requires minimal equipment, typically a large stockpot and basic canning accessories, making it a more budget-friendly option. On the other hand, the specialized equipment needed for pressure canning, such as a pressure canner, can be more expensive. However, the investment in pressure canning equipment can be justified by its versatility and the ability to preserve a wide range of low-acid foods.

Conclusion
In conclusion, water bath canning and pressure canning are two distinct methods of food preservation, each serving different purposes and working best for specific types of foods. Water bath canning is suitable for high-acid foods and offers simplicity, affordability, and vibrant flavors for fruits, pickles, and tomatoes. Pressure canning, on the other hand, is designed for low-acid foods and provides the necessary high temperature and pressure to safely store vegetables, meats, poultry, and seafood. While pressure canning requires more specialized equipment and precise timing, its versatility, long-term storage capability, and thorough bacteria elimination make it a valuable method for preserving a wider variety of foods. Choosing between water bath canning and pressure canning depends on the types of foods you wish to preserve, convenience, and safety considerations. With the right equipment, techniques, and trusted recipes, you can confidently embark on the journey of home canning and enjoy the flavor and convenience of preserved foods all year round.

